Showing posts with label fabric. Show all posts

Tuesday, February 26, 2013

Repurposing Embroidery Hoops

Thank you for visiting. I now have a new home at www.countrypeony.com. I hope you will find me there.

fabric embroidery hoops
I have been thinking for months about a cost-effective decoration for our blank wall in our living room. My initial inspiration came from the polished, yet simple, look of various plates mounted to a wall. I also wanted to stay within our color scheme of dark blue, wood tones, and silver. As I started to research plate options, I soon discovered I would have to pay more than I wanted to for the look I was after.
So, as I researched more ideas online I noticed this post from Apartment Therapy
via
I thought this would be a perfect solution. I could pick out my own fabric and create a fun, personalized pattern. This project would also hold nostalgic value for me, because it reminds me of my late grandmother who taught me how to embroider with her embroidery hoops.

For this project you will need: several yards of different fabric patterns, embroidery hoops of varying sizes (I used six 10 inch hoops, and five 8 inch hoops), scissor, hammer, and nails to hang the fabric hoops onto the wall.

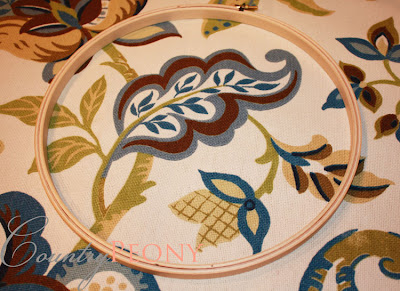
You can start out by deciding what part of the fabric you would like showcased in your hoop. Place the hoop over that part of the fabric, and cut around it (leaving several inches on all sides).
wooden embroidery hoop
From here, you will place the fabric in between the two hoops (ensuring your fabric is still in the same location within your hoops). Once you have the area of fabric you want to showcase in between both hoops you can tighten the screw at the top of the embroidery hoop. You may have noticed that some of the fabric became loose during the tightening process. You can now pull the extra fabric and tighten it between the hoops.
stretching fabric
Once everything is taut, you can cut the excess fabric off from the edge of the hoops.


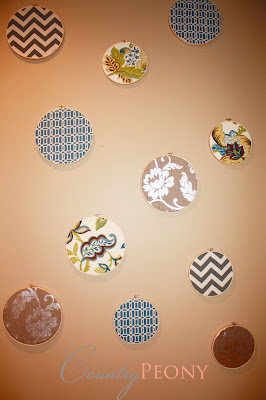
After all of your fabric embroidery hoops are complete, you can start to come up with a pattern placement on the wall for them. Or you can plan as you go and make your pattern very abstract like mine. I eye-balled each location and where I thought it worked best. It is up to you what method you would like to use.

Fabric Embroidery Wall
Check out the wonderful cedar chest my father made my husband and I for our wedding
 Since the initial investment was not a lot, you can repurpose old fabric by changing the fabric out with certain seasons (how fun would it be to change the fabric for Christmas?). Either way, I encourage you to have fun with it!

Monday, February 18, 2013

Dressing Up a Bookcase

Thank you for visiting. I now have a new home at www.countrypeony.com. I hope you will find me there.

Carson 5 shelf bookcase - Target

In the process of decorating our office space, I purchased two Espresso-colored bookcases from Target. The simple design was appealing to me. However, as soon as I placed them in the office space, I knew I needed to “dress” them up.

My first step was to paint the bookcases white, so they could contrast nicely off the deep red walls. My dear friend helped me prime them with Glidden Gripper Grey paint. After the primer was set, we used a fine grit sandpaper to even out the drip marks from the primer. Next we added three coats of Behr White Fur paint to ensure coverage of the white. *If I were to paint over veneer again, I would suggest painting two coats of primer for better coverage instead of one.  

I still wanted to add a little more style to the bookcases, so I decided to add fabric panels to the back. I used the following materials: white duct tape, fabric, pair of scissors, foam board, x-acto knife, plastic bowl, cutting board, and measuring tape.
duct tape

I started by measuring the width and height of each shelf. Once I knew the measurements that I needed, I laid out my fabric so that the patterns would match on both bookcases. I cut each piece of fabric with an extra five inches on each side.
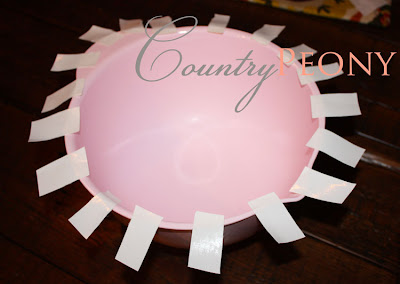
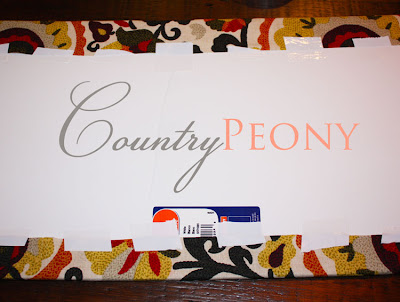
I cut out the foam board with the x-acto knife to match the measurements of each bookshelf. After this, I tested the cut foam board piece in the bookshelf. *You may have to bend the foam board in half to get it into its space for the first time. Once I knew the foam board fit the space well, I placed the foam board on the back of the fabric. From here, I wrapped the fabric around the foam board (adhering with duct tape), like you would wrap a present. *I would suggest cutting the duct tape in advance and placing the cut pieces on the edge of a plastic bowl for easy retrieval. I started off taping down in the middle, and then worked my way out so that the fabric stretched in the appropriate places and it didn’t mess up my pattern.
kitchenaid pink bowl
foam board


foam board with fabric


foam board template

From here, I used the leftover foam board piece from the first foam board as a template. And you repeat the process until you have your desired look.
fabric paneled bookcase 

With this project you can change your fabric out with whenever you would like!
Related Posts Plugin for WordPress, Blogger...