Showing posts with label baking. Show all posts

Tuesday, March 5, 2013

Kale Chips

Thank you for visiting. I now have a new home at www.countrypeony.com. I hope you will find me there. 

With a busy schedule, unfortunately, convenience sometimes outranks healthy as a factor in my food choices. So when I come across foods that are convenient, tasty, and healthy; I leap for joy. This kale recipe does not disappoint.
baked kale recipe
For this baked kale recipe you will need: a handful of kale, salt, pepper, olive oil, salad spinner (optional), knife, cutting board, mixing bowl, aluminum foil, and a baking sheet.
Preheat the oven to 350 degrees.

You start off by cleaning the kale with water (kale leaves have great hiding spaces for dirt). From here, you need to ensure your kale is as dry as you can get it. I recommend using a salad spinner to get all of the extra water off (kale leaves also have great hiding spaces for water). If you don’t have a salad spinner you can dry the kale leaves with a paper towel.
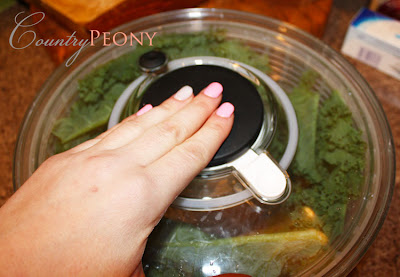
salad spinner
Salad Spinner
From here, I like to cut off the excess vein from the bottom, and then I devein the leaves. From here you will cut the kale into smaller, bite-size pieces.
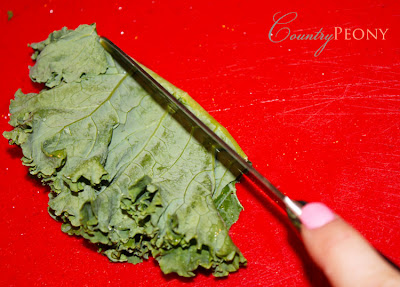
Deveining Kale
Deveining Kale
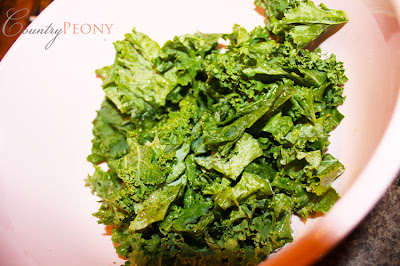
Now you will take the kale and place it in your mixing bowl. Add about 2 tablespoons of olive oil, 1 teaspoon of salt, and 1 teaspoon of pepper. It is best to use your hands as you mix the kale, oil, salt, and pepper. You can always add more ingredients to taste. You can also get adventurous and add an herb like rosemary, or a hot factor like red pepper flakes.

prepared kale

Once you have your set combination of ingredients all mixed together, line a baking sheet with aluminum foil (for easy clean up). Take your kale mixture and spread it across the lined baking sheet. Make sure that you have a single layer of kale on the sheet (you can always use more baking sheets if you need to). The single layer ensures a crispy chip.
Baked Kale

 Place the kale in the 350 degree oven for about 10 minutes. When the kale is ready the edges will be a darker green, and the texture will be crispy. You can always add a couple of more minutes to the timer if you want extra crispy chips (but make sure that you don’t burn your kale).

And voilĂ ! You have a very healthy and easy option to snacking. Enjoy!
Kale Recipe
Krispy Kale Chips


Wednesday, February 20, 2013

The Perfect Pie Crust

Thank you for visiting. I now have a new home at www.countrypeony.com. I hope you will find me there.

My mother has many talents. One that she likes to share with us often is her exceptional baking ability. Last time I visited my parents on their farm I documented how my mother created the perfect pie crust. The end result was divine with its savory and flaky qualities. I cannot wait to try this recipe on my husband and future guests.
Mrs. Fields Cook Book

This recipe is adapted from Mrs. Fields Best Ever Cookie Book, and it makes two pie crusts or one pie crust with a crusted topping. This recipe only requires three ingredients: 3 cups all-purpose flour, 2 sticks (1 cup) of chilled salted butter, and 6 to 8 tablespoons of iced water.


You will place the butter and flour in a food processor on low speed. While the food processor is churning, slowly pour the iced water into the mixture. The mixture should start to stick together like the picture below. If the mixture is not ready, slowly add more water until you get the desired texture. (*You don’t want the butter to melt or to mix completely into the mixture. The flaky, desired crust is made from the solid butter pieces melting into the crust as it bakes.)
Kitchenaid Mixer

Once you have your desired consistency, remove the dough from the food processor. Sprinkle a dry surface with flour and place the dough on top. Then sprinkle more flour on top of the dough (*Don’t go overboard with the flour, because it can dry out the crust. You want enough flour so that the dough doesn’t stick to your hands, the surface, or the rolling pin.)

Pour a small amount of iced water to help pull the dough together as you knead it. Cut the dough in half. Roll each half into a flattened ball. From here you will take a rolling pin (preferably made of wood) and roll from the center out until you get the desired thickness, and size to fit your pie pan. (*Flip over your pie pan onto the dough to measure and determine the crust size you need.)

Pie dough
rolling pin

 Now you can start to place the pie crust into the pie pan. Start by folding the crust in half, and then into a quarter. Then place the tip of the fold into the center of the pie pan and unfold the quarters into the pan. Once you place the pie crust into the pan, you may notice that you have some cracks. Press the dough together to fix any cracks in the pie crust. Then cut the excess crust off the edges with a butter knife. Once you cut off the crust from the edges, crimp the edges down with your finger. Take a fork and punch holes into the bottom of the pie crust to let the steam escape from the crust and to prevent bubbles while it bakes.  


 Bake the pie shell for about 20 to 25 minutes at 375 degrees or until it is golden brown. Cool on a baking rack. This dish can be a great base to build savory and sweet dishes off of. Hope you enjoy!

pie crust
Related Posts Plugin for WordPress, Blogger...