Showing posts with label diy pickles. Show all posts

Tuesday, June 11, 2013

Homemade Crock Pickles

Thank you for visiting. I now have a new home at www.countrypeony.com. I hope you will find me there.

I would like to apologize for my absence. I was very busy with work last week. I hope your week has started off on the right note.

The smells and tastes of today's homemade recipe remind me of sweet summertime, just as much as squash does. I recently showed you how to make homemade dill pickles. Today, I will show you a much simpler and faster process that will  lead to homemade crock pickles. They are the perfect addition to any summer soiree, and they make wonderful gifts.  

Homemade Crock Pickles

For this recipe, you will need: water (I used 6 cups of water), pickling/canning salt (I used 1/4 cup of salt), white distilled vinegar (I used 1/2 cup of vinegar), recycled mason jars (I used 2 mason jar quarts), dill (I used 2 sprigs), onions, garlic clove (I used 1 garlic clove), cucumbers, and grape leaves (this ingredient is optional).  

Like many hand-me-down recipes, the measurements are not exact. So please feel free to experiment with your ingredients to get the desired taste that you want. 

Crock Pickles

After you sterilize your jars and clean your vegetables thoroughly, you will need to prepare your cucumbers. Start by cutting the ends off of each cucumber so that your mixture can disperse evenly into the cucumber. Since I used larger cucumbers, I cut mine into spears. 

Cucumbers

Cucumbers

Next, you will peel the skin off of garlic, and cut the onions up.

Ingredients for Pickles

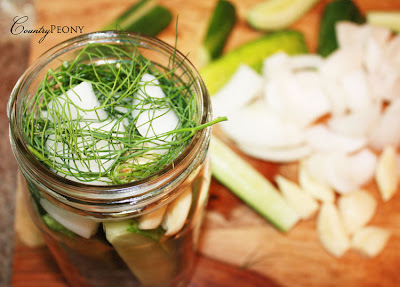
From here, you will place the jar on its side, so that you can stack the cucumbers into the jar tightly. Then you will top your jar off with garlic, onions, and dill. 

From Cucumbers to Pickles

How to make pickles


DIY Pickles


DIY Pickles

In a separate bowl you will add your water, salt, and vinegar together. For two quarts of pickles, I used 6 cups of water, 1/4 cup of pickling/canning salt, and 1/2 cup of white distilled vinegar. I had plenty of mixture left over.  

Once all ingredients are added to a large bowl, you can start to stir the mixture with a fork. Continue to stir until the salt has dissolved.

White Distilled Vinegar


White Distilled Vinegar

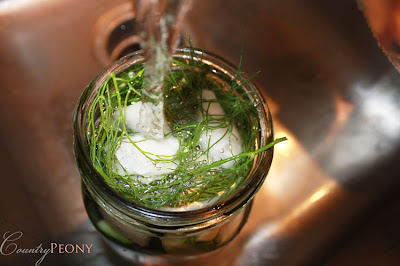
Now you will pour the water, salt, and white distilled vinegar mixture into the quarts and over the cucumbers. 

Pickles

Then cover your filled jars with cotton towels, and set aside at room temperature for about 3 days. 

Homemade Pickles

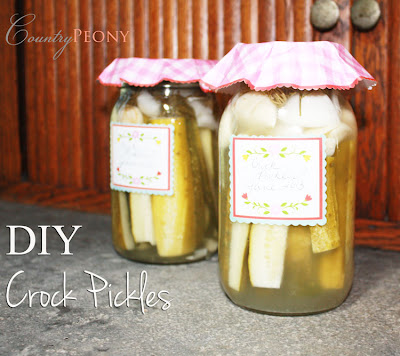
After the third day, you can test your pickles. If they are the desired texture and taste, then label them and place them in the refrigerator. These pickles can last for several months in the refrigerator, but I guarantee you that they won't last that long. :)

Homemade Crock Pickles

I hope you have enjoyed this simple, yet very delicious pickle recipe. Have you ever made crock pickles? If yes, was your process the same or different from mine?

Friday, May 10, 2013

Homemade Pickles

Thank you for visiting. I now have a new home at www.countrypeony.com. I hope you will find me there.

Homemade Pickles

I feel very lucky to have such wonderful parents that I can share lasting memories with, while also learning new things along the way. In honor of Mother's Day, I would like to share a special post featuring my mother.

My mother has been picking cucumbers from my dad's lovely garden for years, and magically turning them into delectable pickles. On a recent visit home my mother showed me how she turned those cucumbers into homemade sour dill pickles. 

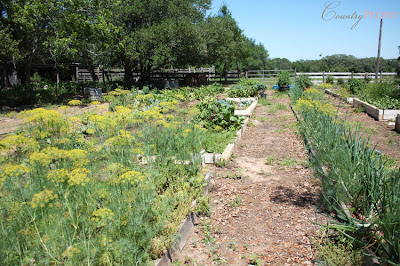
Country Garden

For this recipe of sour dill pickles you will need: pickling cucumbers (small cucumbers), pickling rack, large pot, funnel, jar lifter, canning salt, canning vinegar, garlic, onion, dill (preferably fresh), jar, ring and unused lid. 

how to make pickles

The first step is to add water to your large pot, and bring it to a boil.

As the water is heating up, you need to thoroughly wash and scrub your cucumbers. Dirt can easily settle into the cucumber's ridges. Then you need to cut the ends off the cucumbers. This helps the flavoring to absorb more thoroughly into the cucumber. If some of your cucumbers are too large, I would recommend cutting them into quarters or spears.

Next, you can cut your onions into small cubes. Then remove the skins from the garlic cloves, and set your ingredients aside.

In a small pot make your pickling brine. We used 4 cups of water, 2 cups of canning vinegar, and a 1/2 cup of canning salt. Stir the mixture occasionally until the salt dissolves. (If you have some pickling brine left over, you can store it at room temperature in a leftover jar for later use.)

Once you have prepared all of your ingredients, you need to prep your jars. (My mother recommends investing in a brand-name jar, like Mason, Bal,l or Kerr, because the quality of the jar is crucial to the process of pickling.) You need to ensure that your jars are sterilized. One quick way to strerilize your jars is to load them into the dishwasher, and place the cycle on high heat. You also need to gather your lids. You can re-use screw tops as long as they aren't already rusted from all of the salt that they come in contact with from canning. However, you have to use a new flat cap.
  
turning cucumbers into pickles

Next, take your jar and place it on its side. Start to stack the cucumbers inside the jar. It is kind of like a game of tetris, because you have to pick the correct cucumbers to match the correct spaces. My mother recommends that you pack the cucumbers very tightly, because if you don't the cucumbers will float. The cucumbers also shrink during the pickling process. The packing process can be tedious and hard on your fingers. So I would recommend having a pickling party to make the process more fun :).

DIY Dill Pickles

Once you have packed all of your cucumbers, then you add the garlic, onions, and dill.

Dill Pickles

Next you take your pickling brine, and pour it over the fresh ingredients using a funnel.  

Homemade Pickles 

Then wipe the jar top clean and dry, so that a nice seal is formed during the process.


Dill Pickles

Attach the lid cap to the dry jar top. Add the lid ring while you hold the lid cap down. Tighten extremely well.


Homemade Pickles

Use the jar lifter to slowly lower the jar into the pot of boiling water. This is the most crucial step. You need to ensure that you slowly lower the jar about an inch every 15 seconds so that you can temper the glass. If you don't lower slowly, then you will break the glass jar, and you will have to start over.

Watch and wait as the cucumbers turn into pickles.  

Making Pickles

Keep the pickles submerged until they start to turn colors. You have to trust your instinct on this one. If you leave the pickles in for too long they will become soggy.

Sour Pickles

After you take your pickles out, leave the jar in a safe place until it cools down. Once it cools down, it will create a vacuum and the lid will become concave. Then wait for 2 months until you can finally enjoy your hard work. 


I learned that with the right patience and love, you can create a delightful treat to be enjoyed by all. Thanks mom.

Have you ever made pickles, or pickled? If so, what is your favorite thing to pickle?

Related Posts Plugin for WordPress, Blogger...