Friday, May 17, 2013

Juicing Made Easy

Thank you for visiting. I now have a new home at www.countrypeony.com. I hope you will find me there.

healthy juice

When we received our juicer as a wedding present, I had grand ideas to juice on a regular basis. That dream soon turned sour, because I became a bit overwhelmed with all of the possible ingredient combinations. After some trial and error, I found some key juice recipes that bring my grand idea to fruition.

Today, I would like to share a very simple, yet healthy juice recipe that requires only three ingredients. I especially love this recipe, because the ingredients don't require a lot of prep work.


homemade juice

The fresher the ingredients, the better. This recipe will make 3 servings. I used 3 Granny Smith Apples (you can take 1 apple away if you prefer less calories and less sweetness), 4 carrots, and 3 stalks of celery. 

fresh vegetables

I scrubbed the vegetables and apples clean. Then I cut off the leaves from the vegetables, and cored the apples. For added nutrition, and to save on prep time, I left the skins on the apples. I ran the ingredients through the juicer, and in no time I had a delicious, healthy drink. 

Jack LaLane

Jack LaLane Juicer

The sweet, refreshing, and creamy texture of this drink make it my go-to afternoon drink, or a light meal replacement on busy work days. 

DIY Juice

Are you an avid juicer? What is your favorite juicing recipe?

Wednesday, May 15, 2013

What I'm Lovin'

Thank you for visiting. I now have a new home at www.countrypeony.com. I hope you will find me there.

I do apologize for my delayed posts this week. Event coordinating has been keeping me very busy. I hope your week is going well.


1. Benefit's Fake Up Concealer: I mentioned in a previous edition of What I'm Lovin' that  I don't like to spend a lot of money on makeup. Well, I feel like I am contradicting myself once more, because this product is not cheap. However, Benefit has wonderful products, and this one does not dissapoint. Given my sometimes long work hours, I don't have a lot of time to touch up my makeup. Fake Up concealer is perfect for getting rid of the under-eye shadow, and for minor touch ups throughout the day. I also really like this product, because the moisturizer surrounding the concealer creates a nice, soft finish.

2. Hometalk: Hometalk is known as "the largest home & garden knowledge hub on the web. It's fueled by the firsthand experience & advice of hundreds of thousands of home enthusiasts and professionals." Their description is hard to beat, because that is exactly what Hometalk is about. It is a wonderful resource of inspiration. You can also post projects and questions for feedback.

3. Sally Hansen's Airbrush Legs: Summer is around the corner, and sun is in abundance here in Texas. However, I am trying to proctect my skin from the daily rays. A dear friend of mine recommended Sally Hansen's Airbrush Legs to add a little color to my light skin. The product dries instantly, and it creates a natural, flawless finish. I have worn it on several occassions, and it does not rub off throughout the day. It is a perfect accessory for a summer picnic, wedding, or any occassion where your legs are on display.

4. Style Me Pretty Living: I have spent many hours perusing the beautiful pages of Style Me Pretty. I was thrilled when I heard that Style Me Pretty now has a separate lifestyle site called: Style Me Pretty Living. It is what you would expect from the wonderful editors of Style Me Pretty. The stories and pictures are flawless, and they ooze with prettiness :).

I hope you have enjoyed this edition of What I'm Lovin'. What are you loving this week? Are you familiar with any of the products above? If so, what do you think of them?

*I was not compensated for this post. The paragraphs above reflect my personal opinion.

Sunday, May 12, 2013

Happy Mother's Day

Thank you for visiting. I now have a new home at www.countrypeony.com. I hope you will find me there.

Happy Mother's Day to all of the beautiful mothers and motherly figures out there. May your day be filled with love and gratitude.

Friday, May 10, 2013

Homemade Pickles

Thank you for visiting. I now have a new home at www.countrypeony.com. I hope you will find me there.

Homemade Pickles

I feel very lucky to have such wonderful parents that I can share lasting memories with, while also learning new things along the way. In honor of Mother's Day, I would like to share a special post featuring my mother.

My mother has been picking cucumbers from my dad's lovely garden for years, and magically turning them into delectable pickles. On a recent visit home my mother showed me how she turned those cucumbers into homemade sour dill pickles. 

Country Garden

For this recipe of sour dill pickles you will need: pickling cucumbers (small cucumbers), pickling rack, large pot, funnel, jar lifter, canning salt, canning vinegar, garlic, onion, dill (preferably fresh), jar, ring and unused lid. 

how to make pickles

The first step is to add water to your large pot, and bring it to a boil.

As the water is heating up, you need to thoroughly wash and scrub your cucumbers. Dirt can easily settle into the cucumber's ridges. Then you need to cut the ends off the cucumbers. This helps the flavoring to absorb more thoroughly into the cucumber. If some of your cucumbers are too large, I would recommend cutting them into quarters or spears.

Next, you can cut your onions into small cubes. Then remove the skins from the garlic cloves, and set your ingredients aside.

In a small pot make your pickling brine. We used 4 cups of water, 2 cups of canning vinegar, and a 1/2 cup of canning salt. Stir the mixture occasionally until the salt dissolves. (If you have some pickling brine left over, you can store it at room temperature in a leftover jar for later use.)

Once you have prepared all of your ingredients, you need to prep your jars. (My mother recommends investing in a brand-name jar, like Mason, Bal,l or Kerr, because the quality of the jar is crucial to the process of pickling.) You need to ensure that your jars are sterilized. One quick way to strerilize your jars is to load them into the dishwasher, and place the cycle on high heat. You also need to gather your lids. You can re-use screw tops as long as they aren't already rusted from all of the salt that they come in contact with from canning. However, you have to use a new flat cap.
  
turning cucumbers into pickles

Next, take your jar and place it on its side. Start to stack the cucumbers inside the jar. It is kind of like a game of tetris, because you have to pick the correct cucumbers to match the correct spaces. My mother recommends that you pack the cucumbers very tightly, because if you don't the cucumbers will float. The cucumbers also shrink during the pickling process. The packing process can be tedious and hard on your fingers. So I would recommend having a pickling party to make the process more fun :).

DIY Dill Pickles

Once you have packed all of your cucumbers, then you add the garlic, onions, and dill.

Dill Pickles

Next you take your pickling brine, and pour it over the fresh ingredients using a funnel.  

Homemade Pickles 

Then wipe the jar top clean and dry, so that a nice seal is formed during the process.


Dill Pickles

Attach the lid cap to the dry jar top. Add the lid ring while you hold the lid cap down. Tighten extremely well.


Homemade Pickles

Use the jar lifter to slowly lower the jar into the pot of boiling water. This is the most crucial step. You need to ensure that you slowly lower the jar about an inch every 15 seconds so that you can temper the glass. If you don't lower slowly, then you will break the glass jar, and you will have to start over.

Watch and wait as the cucumbers turn into pickles.  

Making Pickles

Keep the pickles submerged until they start to turn colors. You have to trust your instinct on this one. If you leave the pickles in for too long they will become soggy.

Sour Pickles

After you take your pickles out, leave the jar in a safe place until it cools down. Once it cools down, it will create a vacuum and the lid will become concave. Then wait for 2 months until you can finally enjoy your hard work. 


I learned that with the right patience and love, you can create a delightful treat to be enjoyed by all. Thanks mom.

Have you ever made pickles, or pickled? If so, what is your favorite thing to pickle?

Tuesday, May 7, 2013

DIY Curtain

Thank you for visiting. I now have a new home at www.countrypeony.com. I hope you will find me there.

DIY Curtain
The open concept floor plan of our house was a major reason my husband and I fell in love with it. However, some aspects of our house may be a little too open concept. My husband and I are in the process of updating a large space next to our great room into a theatre space. That said, we wanted to be able to close off the open doorway if necessary. We also didn't want to spend a lot of money on a permanent fix for the doorway. So we decided to add a curtain. This curtain was extremely simple to create. We are very happy with the result, and as soon as we are not happy with the result we can take it down.

Theatre Room
The hallway before the curtain was added.
For this simple DIY project, you will need: measuring tape, straight pins, fabric 1 1/2 times the width of the space you are covering to allow for scrunching (if you don't know how much fabric you need for your space, I would recommend bringing your measurements to the store with you and asking a sales associate what he/she recommends), sewing machine (or if you have the patience you can sew by hand), thread that matches your fabric, scissor, and a curtain rod with brackets and screws.

*As a warning, I am a visual person, and so I don't like to deal with exact numbers. So I do apologize in advance if this tutorial is more confusing than helpful. :)

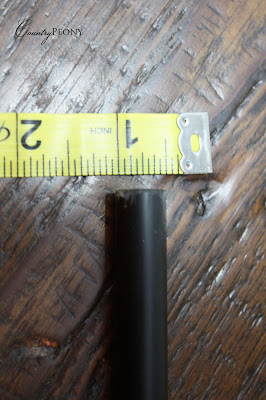
I started the project off by measuring the thickness of the curtain rod. I took that measurement and then applied it to one end of my fabric. I marked off how much space I would need so the rod could fit into the fabric loop. Then I measured the same distance creating the same loop with stick pins down the same end of the fabric.

curtain rod

From here, I started to sew the edge of the loop that was attached by stick pins.

*When working with stick pins, always place the pin head toward you so that you don't stick yourself or ruin your machine when you are pulling the pins out.

*If you would like to create a nice hem, sew about a 1/2 inch seam to hide the rough edge of the fabric. Then proceed with sewing the loop for the rod to go through. I chose to keep the natural raw edge, because it matched the fabric that I was working with. 

sewing machine

Next, I would recommend attaching the curtain rod to the wall. I mentioned above that I am more visual than number-based when it comes to projects. So, for the next step I inserted the curtain rod that was attached to the wall into the curtain loop. I then measured what length I wanted my curtain. I feel this is a good way to get the exact measurement and look that you are after. Maybe I am the only one, but I do not like curtains that are too short or too long. I prefer the curtains to hang a little and billow on the floor, but not to the point that they are a safety hazard. 

billow

So, while the extra curtain was laying on the floor, I determined where I wanted it to hang. I inserted my handy stick pins as a guide for where I wanted the curtain to end. 


From here, I took the curtain off of the rod, and then sewed the curtain to the length that my stick pins were. I then restrung the rod through the curtain, and stepped back to take a look at the finished product.

DIY Curtain

DIY Curtain
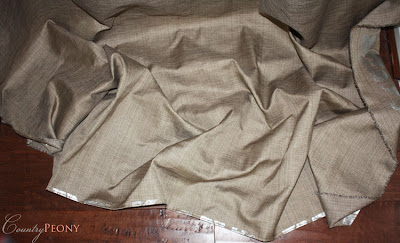
Can you tell that I love this fabric, I also used it in my embroidery hoop art project.

I also added the option of using a metal hook and decorative rope to open the area if we wanted the theatre room to be more accessible.  


homemade curtain

homemade curtain

This project was much simpler than I anticipated, and I am excited to work on other curtain projects.

I feel curtains are also another way to add art to a space. Have you ever made your own curtains? If so, do you have any tips?

Friday, May 3, 2013

Homemade Fruit Strips

Thank you for visiting. I now have a new home at www.countrypeony.com. I hope you will find me there.

Homemade Fruit Strips

Growing up my mother always tried to come up with healthy and creative snacks for myself and my four siblings. One of my favorite treats as a child was homemade fruit strips. My husband and I received a dehydrator for our wedding, and I recently learned how easy the fruit strips are to make. I enjoy keeping a stash of these around when last minute company arrives, or for a quick on-the-go snack.

For this recipe I used strawberries, but you can experiment with any fruit that is in season. You will need: 2.5 quarts of cut strawberries, dehydrator with a vegetable/fruit tray, blender, cooking spray, and parchment paper.

Prepare your strawberries for the blender, then puree them to a consistency that you prefer. Once you have reached your desired consistency, pour the fruit puree on to the tray in the dehydrator, and evenly spread the puree out. *I would recommend spraying cooking spray on to the tray first, so that the fruit puree doesn't stick. Close the lid to the dehydrator and cook at 135 degrees Farenheit for 8 hours. *Make sure that the dehydrator is in a well ventilated area. From here, you will peel the dehydrated fruit puree off, and cut the dried puree into strips. Then place the strips in between parchment paper and store in a container with a sealed lid. Enjoy!


Strawberry Puree

Strawberry Puree

Dehrydrator Strawberry Puree

Dehydrator Fruit Strips

Strawberry Fruite Strips

DIY Fruit Strips


Strawberry Fruit Strips

Wednesday, May 1, 2013

Homemade Yoga Mat Cleaner

Thank you for visiting. I now have a new home at www.countrypeony.com. I hope you will find me there.

Yoga helps me in many ways. It helps me to stay focused, calm, appreciative, and mindful of my health and others. I try to practice about three times a week. About a year ago, I invested in a nice yoga mat to improve my practice. (I use a manduka, and I have been very pleased with the quality of this mat). When I purchased it I noticed it needed to be broken in, so I made a yoga mat cleaner to improve my practice on the mat. Also, the dirt that the studio carries, and the dirt and oils that you carry can decrease the quality of the mat overtime. When my hands and feet start to slip on my yoga mat, I know it is time for a cleaning (roughly once a month). The amount you should clean your yoga mat is dependent upon the amount that you practice, and your preference. The good thing about this yoga mat cleaner is that it is cheap, customizable, and easy to make. *Before trying this recipe I would recommend looking through the manual or website of your mat's brand. Some mats require specific cleaners.

Homemade yoga mat cleaner

For this cleaner, I use: 2 teaspoons of white vinegar (you can use more, I just don't like the smell of vinegar), 6 tablespoons of water, washcloth, spray bottle or a jar with a lid, and 8 drops of essential oil. (I love the smell of rose oil, and so I chose Rose Absolute by Aura Cacia. However, you can customize the oil to your scent preference, and some oils can help focus your practice. For example, if you like to destress during your practice I would recommend lavendar. Or if you like to recharge during your practice I would recommend peppermint.)

I added all of the ingredients into a mason jar (you can use a spray bottle instead).

white vinegar

Then mix thoroughly until all ingredients are blended well.

Yoga Mat Cleaner

rose absolut oil

From here, you take your washcloth and spread the cleaner on to your yoga mat generously. After you have rubbed the mixture in, let the yoga mat dry. This process should take about 10-15 minutes. If it is a nice day, I would recommend letting the yoga mat dry in the sun for several minutes. Once one side is complete, I recommend repeating the process on the other side.

Yoga Mat Cleaner

Outtake: My husband surprised me as I was cleaning my mat.
It is amazing what a difference a clean yoga mat can make for your practice. Hope you enjoy!
Related Posts Plugin for WordPress, Blogger...